Wednesday, July 29, 2015

Top 10 Essential Programs for Windows 10

Windows 10

Windows 10 comes out on July 29, and it's going to be free for most home users of Windows 7 and 8.1 until July 2016. The main goal of Windows 10 is to culminate an effort to unify the Windows operating system across multiple Microsoft product families—including PCs, tablets, smartphones, embedded systems, and Xbox One, etc.

We've collected the top ten essential programs for Windows 10. Lets proceed on to get more information about these essential programs for Windows 10.
Microsoft Office

1. Microsoft Office

Microsoft Office is one of the essential software which are installed immediately after a fresh installation of Windows OS. Microsoft Office is a bundled software developed by tech giant Microsoft. The package of Microsoft Office includes office programs like Microsoft Word, Microsoft Excel, Microsoft PowerPoint, etc.

Google Chrome and Mozilla Firefox

2. Google Chrome/Mozilla Firefox

To start with the internet browser for Web Browsing, you can choose between Google Chrome and Mozilla Firefox.
Google Chrome is sleek & fast web browser developed by Google. On the other hand, Mozilla Firefox is fast and most stable web browserdeveloped by Mozilla. These two web browsers are most popular and used browser in the world.
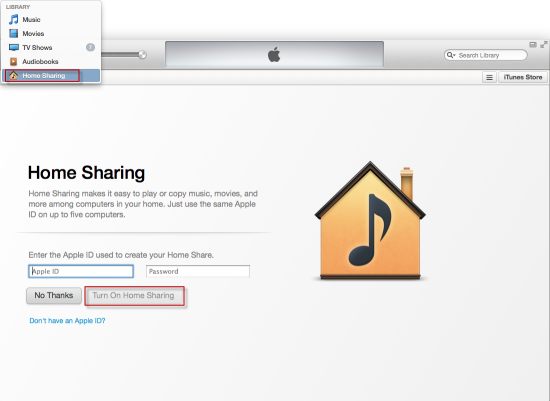
iTunes 12.2

3. iTunes 12.2

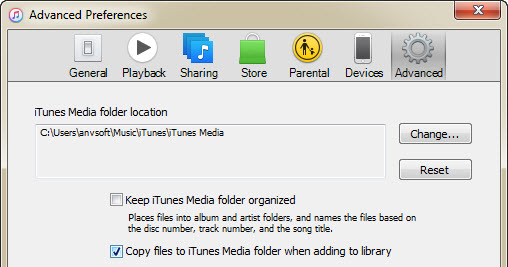
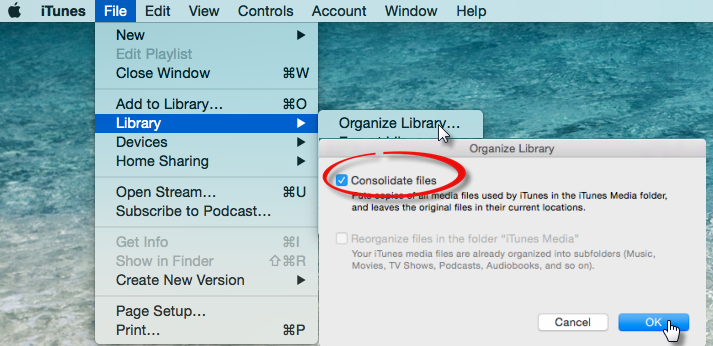
iTunes is a media player and media library application developed by Apple Inc. It is used to play, download, and organize digital audio and video (as well as other types of media available on the iTunes Store).
iTunes 12.2 allows users to access the new Apple Music service and the Beats 1 radio service on their desktop computers

M4VGear for Windows

4. M4VGear for Windows

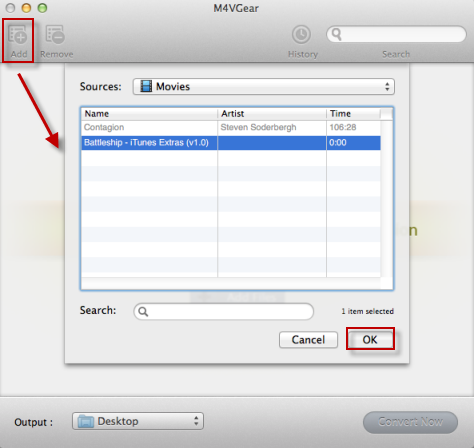
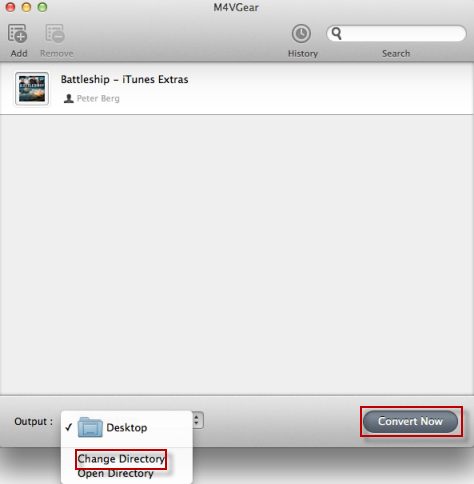
M4VGear DRM Media Converter is the Fastest DRM remover which can remove DRM from your iTunes videos at 20X faster speed on Windows while simultaneously keeping AC3 5.1 audio of iTunes videos. It cantransfer all iTunes M4V video files including your iTunes purchases or rentals to various unprotected video and audio formats like MP4, AVI, MOV, etc. or portable devices like Samsung, PS3, Xbox, iOS devices and so on with perfect output quality.
 VLC Media Player

5. VLC Media Player (64-bit download32-bit download)

VLC media player is a free and open-source media player and streaming media server on which you can directly play almost all kinds of videos on Windows and Mac. Besides, it can act as a home media server which allows you share and play your media contents on the devices that are connected to your home network.

CCleaner

6. CCleaner

CCleaner is a tool to clean up your system from temporary and unnecessary files that clogs up your operating system. Many programs run silently in the background when you start up your computer. CCleaner helps you get to work, or play faster by letting you disable unneeded programs.

Avast

7. Avast! Free Antivirus

No matter how careful you are, every computer should have a good antivirus program installed. Avast Free Antivirus, as one of the best free antivirus software, can do a great job in protecting your system from malware infection. It is also a popular free antivirus software. 

Skype

8. Skype

Skype became very popular in recent years letting you make free voice and video calls to other Skype users, and to call any regular phone line for reasonable rates. You can also chat online for free, and because it’s so widely used, there are few people you can’t communicate with for free using this service.

Adobe Reader

9. Adobe Reader

Another must have program is Adobe Reader that is an intuitive software to read PDF files. Adobe Reader is a program or software developed by Adobe Systems. With Adobe Reader, you can open, view. create, edit and print PDF files.


Dropbox

10. Dropbox

For securing your important data and accessing it anywhere, you should need a cloud storage service for backing up some datas. It offers 2GB free capacity and your files can be accessed from anywhere at anytime. In time when you loose your laptop or computer. You don’t have to worry, you can get your files back again.

tips Tips in the End

1. Both Windows version and Mac version of M4VGear are available. If you are running Mac OS, please download Mac version here.
2. The trial version of M4VGear allows 1 minute free conversion. Now, get M4VGear full version at$44.95 ($49.95) and enjoy life-time free updates and free tech supports.

Buy Mac  Buy Windows

Sunday, July 26, 2015

How to Backup iTunes Library to External Hard Disk ?

"My iTunes library has been filling up fast with movies and TV shows, and as a result it's taking up more and more space on the small hard drive in my computer. Is there any way to store those iTunes files to my External Hard Disk ? "
Laptop connected with pc
Transferring your iTunes library to external hard drive is a good idea to free up space on your hard drive, or to protect your library in case of data loss. But you should make sure your external hard drive has enough space for storing your entire library and keep your files organized with ratings, playcounts, and other metadata. Here is a detailed tutorial about how to backup iTunes library to External Hard Disk.

Step-by-step Guide to Back up iTunes Library to External HD

Part 1: Consolidate iTunes Library

First, be sure that all of your items in your library are in one place.
If you choose to consolidate your iTunes library, iTunes will locate all music and videos on your computer and add it automatically, making the iTunes consolidation process much faster than manually adding music and movies into one location.
1. Find iTunes Advanced Preferences:
Mac Mac Logo: "Choose iTunes -> Preferences -> Advanced". Check the option "Copy files to iTunes Media folder when adding to library" and then click OK.
Windows Windows Logo: "Choose iTunes Menu -> Preferences -> Advanced". Check the option "Copy files to iTunes Media folder when adding to library" and then click OK.
Find Preference
Note: When you check this option and add files to iTunes, iTunes places copies of the originals in the iTunes Media folder. The original files are left in their original locations.
2. Select The Option to "Consolidate Files."
Choose File -> Library -> Organize Library. It would pop up a window and then select the option to “Consolidate files” and click OK. It would take just a few seconds.
Consolidate Files
If you originally did not have the option to copy files enabled, iTunes will copy files outside of the iTunes Media folder from their original locations to the iTunes Media folder. To save space on your hard disk, you might want to delete the original files after confirming they have been moved and are backed up.

Part 2:Copy iTunes Library to Your External Hard Drive

After completed these steps, your iTunes library files are all in one place and are ready to be backed up to your external hard drive.
Mac Path
1. Quit iTunes.
2. Locate your external drive.
Mac: On the desktop or Finder sidebar.
Windows: In “My Computer”.
3. Locate your iTunes folder:
By default, the iTunes folder is located in:
Mac OS X: /Users/username/Music
Windows XP: \Documents and Settings\username\My Documents\My Music\
Windows Vista: \Users\username\Music\
Windows 7 or 8 or 10: \Users\username\My Music\
If the iTunes folder is not in the default location listed above, you can find the iTunes folder by following these steps:
  • Step 1. Open iTunes Preferences:
  • Mac Mac Logo: “Choose iTunes -> Preferences -> Advanced"
    Windows Windows Logo: “Choose iTunes Menu -> Preferences-> Advanced".
  • Step 2. The location of your iTunes folder will be listed in the "iTunes Media folder location" box.
 Find Location
4. Drag the iTunes folder to your external hard drive. This will begin the iTunes backup. The amount of time the backup will take depends on the size of your library. When the transfer is done, your backup is complete and your external hard drive can be disconnected.
Drag to External Hard Disk
5. After the transfer process is complete, your iTunes library has been successfully transferred to your external hard drive.

How to Enjoy iTunes Videos from External Hard Disk ?

Now you know how to offload your entire iTunes Library to an external drive. However, those iTunes videos purchased and rented from iTunes Store are protected by DRM and can only be played with iTunes. In order to enjoy those iTunes videos from External Hard Disk, we should unlock DRM limitation from isTunes videos and convert them to unprotected videos format before transferring them to your External Hard Disk. M4VGear DRM Media Converter is such an innovative tool as it easily allows one to strip the DRM videos downloaded from iTunes and make them DRM-free.
M4VGear Box

Main Features of M4VGear DRM Media Converter:
icon Remove DRM from both iTunes rentals and purchases;
icon Losslessly convert iTunes videos at 20X faster speed;
icon Convert iTunes Videos to multiple unprotected video formats;
icon Keep all subtitles and audio tracks including 5.1 audio track;
icon Support batch conversion;
icon Highly compatible with the latest iTunes version 12.3.

If you are interested in giving M4VGear app a try, then you can download this product from download center. If you would like to purchase, then the app is available at a discounted price of $44.95 here.
M4VGear for Mac
Buy Mac Version
M4VGear for Windows

Tuesday, July 21, 2015

How to Extract Chapter from iTunes Videos by Clipping on Windows

Want to crop a specific part of the video during conversion? M4VGear has got you covered.

M4VGear DRM Media Converter for Windows is the fastest software to remove DRM protection from iTunes media files and convert M4V to commonly used non-protected formats including MP4, AVI, WMV, MOV, MPG, etc. Besides a powerful DRM removal tool, M4VGear DRM Media Converter for Windows also enables users to extract chapter from the whole iTunes videos by clipping. 


Guide: How to Extract Chapter from iTunes Videos by Clipping on Windows

Step 1. Add iTunes Video Files to M4VGear for Windows

Double clicks to launch the M4VGear on your Windows and click on the "Add" or "Add Movie" button. There will pop up iTunes library showing all the movies, TV shows and other M4V videos you purchased or rented from iTunes. Please choose the videos you want to convert and click "OK" button.
Add iTunes M4V videos

Step 2. Choose Output Profile

Select the file and click "Profile" button to choose the output profile in the drop-down list. You can choose different output profile for each video file.
Choose output profile

Step 3. Extract Chapter from iTunes Videos by Clipping

Click the time setting box then choose "Clip Video" option, input the Start and End time to convert the clips which you want.
clip iTunes videos

Step 4. Convert iTunes Video Clips

After the adding and setting work have been done, you can remove iTunes DRM protection and extract chapter by clipping with only one click.
Convert iTunes clips

Thursday, July 16, 2015

How to Transfer iTunes Videos to Kindle Fire HDX 8.9 ?

Tablets change people's life in a big way which are smaller for carrying than computer and you can also hold them on hand for surfing the Internet, watching videos, reading books and so on. Many people want to transfer iTunes videos to Tablets, so that they can enjoy those HD movies anywhere and anytime.

Kindle Fire HDX 8.9 is a tablet issued by Amazon on September 25, 2013 and refreshed in the model in September 2014. Except the common functions of tablet, Kindle Fire HDX 8.9 has some outshining features that make it stand out of tablets:
  • The lightest large tablets currently on the market. It is even lighter than a magazine.
  • A very high resolution of 2560 × 1600 and pixel density of 339 PPI.
  • The battery can last for 12 hours for surfing Internet, watching video, etc.
  • The refreshed version in 2014 possesses a very fast processor and powerful graphics processing.
Fire HDX 8.9
Amazon is trying to make Kindle Fire HDX 8.9 more suitable for surfing Internet, watching videos, etc. It has succeeded, at least in playing videos. Its lightness for holding on one hand, high resolution and long-lasting battery turn video watching into a visual enjoyment. But before you transfer videos from computer to Kindle Fire HDX 8.9 for playback, checking what formats it supports is necessary.
Video formats: MP4, 3GP, VP8 (video playback at 720p)
Audio format: Dolby Digital (AC-3), Dolby Digital Plus (E-AC-3), MP3, Non-DRM AAC (.m4a), MIDI, OGG, WAV, OGG, WAV, MP4, AAC LC/LTP, HE-AACv1, HE-AACv2, AMR-NB, AMR-WB
Document format: AZW, TXT,PDF, MOBI, PRC, DOC, DOCX
Images format: JPEG, GIF, PNG, BMP
Apparently, M4V videos purchased and rented in iTunes do not among the supported videos by Kindle Fire HDX 8.9. Because not only the M4V format is not among the above list, but also the DRM protected iTunes videos restrict them from transferring to non-Apple devices for playback, which is the main reason to playing failure. Therefore, as long as iTunes videos have been removed DRM from and converted to formats like MP4, Kindle Fire HDX 8.9 is capable of playing them successfully.
Kindle Fire HDX 8.9 plays video

How to Remove DRM from iTunes videos and convert them to MP4 format?

1) First of all: Find a good DRM Removal Software to do this job.
M4VGear DRM Media Converter recommended here has good reputation among users. It is a DRM Remover specializing in unlock the DRM on iTunes videos and convert them to MP4 formats. It surpasses others by converting at 20X faster speed, retaining original quality, keeping subtitles of multi-language and preserving 5.1 audio track, etc.
System supported by M4VGear:
Windows: Windows XP, Vista, 7, 8, 10 (32-bit & 64-bit)
Mac: Mac OS X 10.8, 10.9, 10.10 & 10.11
Download M4VGear DRM Remover for Mac  Download M4VGear DRM Remover for Win
2) Then, remove DRM from iTunes videos and convert them to MP4 with M4VGear(See below tutorial)
Step 1: Launch M4VGear and iTunes will be popped up with it automatically. Set iTunes aside during conversion unless some error happens.
Step 2: Click "Add Movies" button on M4VGear to open iTunes library and choose videos to be imported to M4VGear.
add m4v files
Step 3: Click M4VGear > Preferences and Change the output folder to store the output videos as you prefer.
change output directory
Step 4: Click "Convert" button on the bottom right to start the DRM removing process.
converting m4v files

Step 5: After the conversion is finished, find the output videos in the output folder and transfer them to Kindle Fire HDX 8.9 for playback.
Tips: M4VGear will offer you a 1 minute free trial which will let you convert one minute of iTunes rentals for free. If you want to unlock the time limitation, please purchase M4VGear. The price now is $44.95, decreasing from original $49.95 by $5.
Buy Mac  Buy Windows

Saturday, July 11, 2015

How to Watch iTunes Extras on Apple TV

 Many people have complained that they have purchased iTunes Extras from iTunes only to find that they are not compatible with Apple TV. The fact is that iTunes Extras can only be streamed with iTunes on a Mac or a PC. And iTunes Extras now cannot be played on second and third generations of Apple TV though they are supported by original silver Apple TV.

M4Vgear DRM Media Converter offers a very simple way to make iTunes Extras watchable on Apple TV. The detailed tutorial is as follows.

Tutorial: How to Watch iTunes Extras on Apple TV With M4VGear?
Step 1: Equipment Preparation
Things you need A computer with Windows OS or Mac OS
Things you need An USB device
Things you need The latest version of iTunes
Things you need The latest version of M4VGear DRM Media Converter

Download M4VGear DRM Remover for Mac  Download M4VGear DRM Remover for Win

Step 2: Add iTunes Extras
Click "Add" button on the upper left to open iTunes library. You will find iTunes Extras automatically show in the Movie of drop-down list. Choose the one you want to convert and click OK to apply.

add itunes extras to M4VGear

Step 3: Change Output Directory and Convert Now
Click "Change Directory" to change the output path to Music>iTunes>iTunes Media>Automatically Add to iTunes so that the converted iTunes Extras can be automatically added to iTunes Library. Then click "Convert Now" button to starting converting iTunes Extras to MP4 format.
change output directory and start converting
Step 4: Watch converted iTunes Extras on Apple TV
In iTunes, choose Home Sharing to enter your Apple ID and then click Turn On Home Sharing. Apple TV will automatically find these iTunes Extras in iTunes library. Now start watching iTunes Extras on Apple TV.
turn on homw sharing

What else can M4VGear do for you?

  • Remove DRM from iTunes purchases and rentals and convert them to MP4 format.
  • Remove DRM from iTunes movies, TV shows and music videos at unbeliveable 20X faster speed.
  • Get DRM-free iTunes videos with lossless quality.
  • Compatible with the latest version of iTunes and Mac 10.8 and 10.9.

About iTunes Extras

iTunes Extras
iTunes Extras includes the featured movie and chapter selection along with special features such as movie stills, deleted scenes, exclusive interviews, and behind-the-scenes footage. Many of these special features are replicated from a movie's DVD/Blue-ray release, and the iTunes Extras interface even resembles a disc's menu scheme. But iTunes Extras of certain movies may come out before DVD or Blue-ray Disc distribution.
Note:
1. iTunes Extras content will be downloaded to My Movies and can be identified by the icon icon to identify iTunes Extras to the right of it.
2. iTunes Extras is only available in iTunes purchases.
3. iTunes Extras can be synced between Computer and first generation of Apple TV only in the occasion of iTunes 10 or later and Apple TV 3.0 or later.